

What If Adventure Time Was A 3d Anime Game Adding Save File
Behind the scenes of this adventurous 3D illustration
As a product manager in an app development team in China, Luoqin creates high-resolution 3D art as a hobby and says that his love of CG and all the great CG masterpieces is what drives him to create CG illustration.
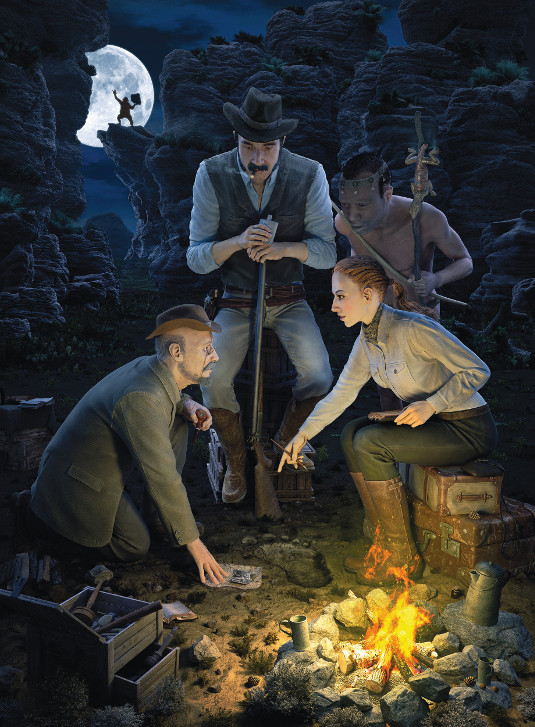
Footprint took Luoqin three months to create and was inspired by an old-fashioned sense of adventure imbued with some black humour. The scene depicts a palaeobiology team who have found a creature's footprint, however, they are unaware that they are being stalked.
"I conceived this story about exploration and adventure after watching a lot of movies about the Wild West," says Luoqin. The original idea was of a scene featuring a group of Western cowboys drinking next to a campfire. "Then I thought, why not make it a bit dark and humorous? So I imagined a story about a serious palaeontologist investigating a footprint he and his company have just found; and the savage is right beside them."
Luoqin typically works from sketches on paper. Then uses ZBrush to freeform sculpt and arrange the ideas. Once done he collects reference, refines his character models using DynaMesh in ZBrush and does retopo work using 3ds Max, as well as making UVs in UVlayout. For textures, Luoqin uses Mudbox and Photoshop and puts all the models into 3ds Max for lighting and rendering. Finally, Photoshop is used to sort out the composition.
To save time Luoqin uses the MultiScatter plug-in for 3ds Max to create the ground; the sand, rocks, ash and plant elements.
"I got a lot of experience creating Footprint, especially managing such a large scene," says Luoqin, but adds every image always comes back to the big idea: "When I finished this idea, I could not stop laughing. It's indeed a funny story."
Follow Luoqin's process from start to finish.
01. Sketch the initial idea
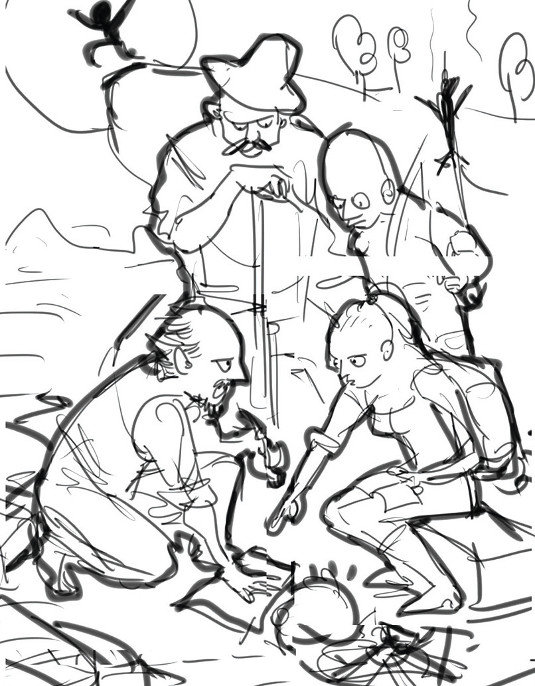
When the idea for a story strikes, you need to catch it quickly as otherwise it can change and become something else. I originally envisioned the scene taking place in a desert. Through the moonlight on the hill behind, you can see a savage who was originally supposed to be running away.
02. Rapid prototyping
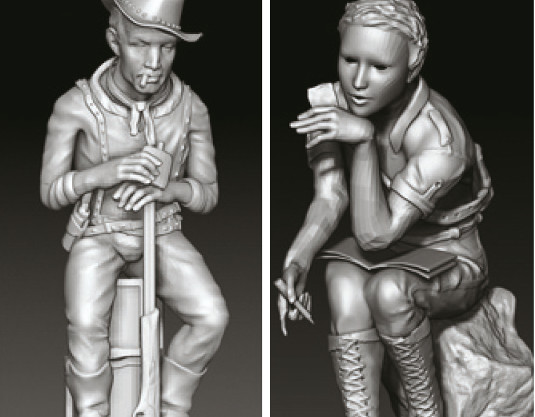
After the outline sketches are complete, the next step is to carry out various roles in rapid prototyping. At this point you need to work fast and with flexibility. You can see the final form of these characters is very different to the prototyping ones – that's thanks to the free shaping.
03. Character design
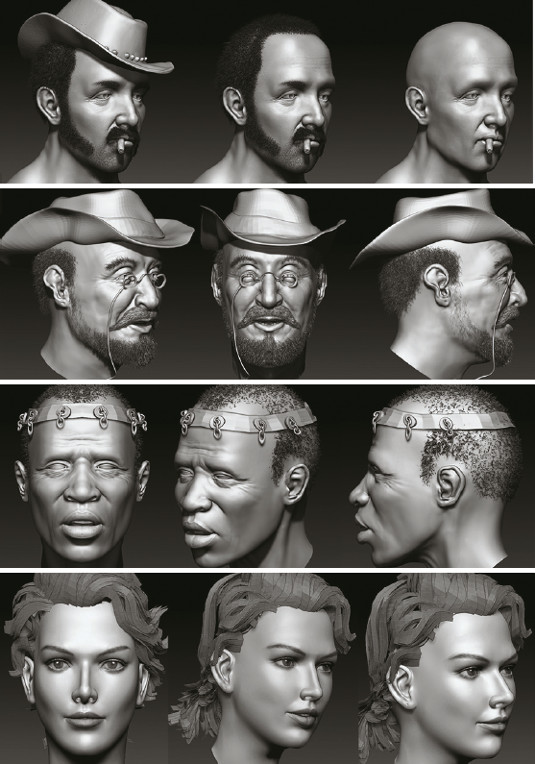
Put the rapid prototyping into the original sketch; you should be able to feel a harmony between these. The next step is to work on the characters' features, so each character's face needs to be refined. When working on this, think about the character's mood: the facial expression needs to reflect the characteristics of the person.
04. Detailed modelling
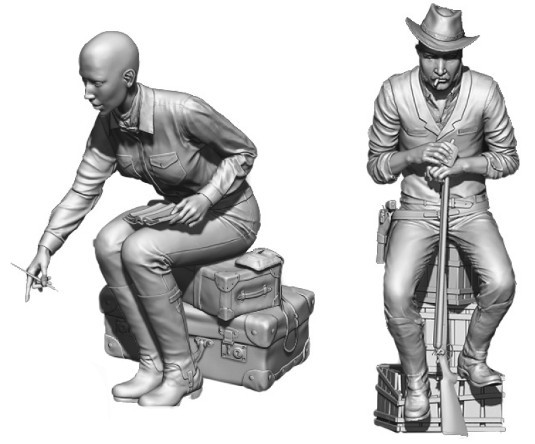
At this stage I use costume photos or action pictures for reference. Due to the setup each of my characters has a completely different posture and they also have different characteristics. So, at the same time as defining their poses, I complete the accessories and equipment for each of my figures to help to sell their stories.
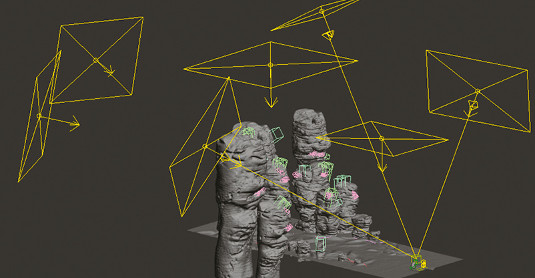
05. Help from PhotoScan
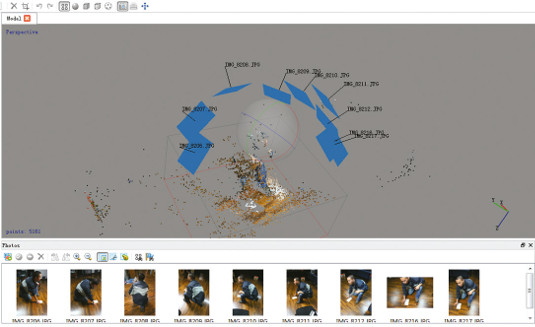
It was difficult to grasp the squatting pose of the palaeontologist character in a realistic manner, because of his crouched posture. In order to help, I used the software Agisoft PhotoScan, which converts my photos to create a simple reference mesh. I can then use this mesh to help me to easily build the model using ZBrush's Transpose tools.
06. Using MultiScatter
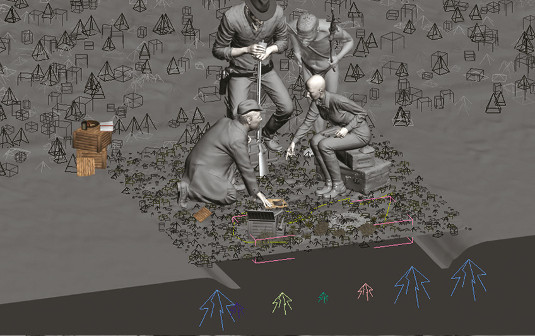
As the ground, bonfires and vegetation are close to the viewer I want to achieve a high level of detail and accuracy to create them, so I use the MultiScatter plug-in for 3ds Max to assist with the layout of the grass and stones. I also use MultiScatter to arrange about 5,000 ash elements, which add further realism to the campfire and the ashes.
07. Lighting scheme
As the scene becomes more complex, more lights are added accordingly. I use the grouping approach for various lights; for example each character and group of rocks in the background features independent illumination. This speeds up the process and makes adjusting the lighting later much easier.
08. Plain model rendering test
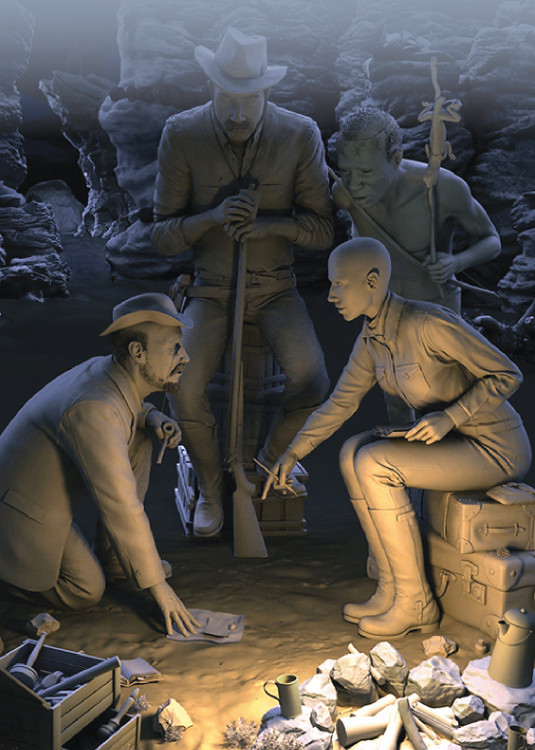
You can see from this final test pattern that the lighting helps to emphasise the difference between the cold and warm colours. The rim lighting simulates the cold moonlight in the background of scene nicely. By fine-tuning the campfire's light as much as possible, I manage to use it to illuminate the scene with warm tones.
09. Composition and final retouching

After rendering, it's always best to fine-tune your work. I use Photoshop for doing post-processing work. Here I use Photoshop to create the flame of campfire, the moon's details and the glow of the cigar. After stitching all these elements into the render, I then carry out a detailed adjustment for hue, brightness and sharpness. Finally, my work is complete.
Words: Luoqin Chuan
This article originally appeared in 3D World issue 179.
Related articles
What If Adventure Time Was A 3d Anime Game Adding Save File
Source: https://www.creativebloq.com/3d/behind-scenes-adventurous-3d-illustration-51411730
0 Response to "What If Adventure Time Was A 3d Anime Game Adding Save File"
Post a Comment